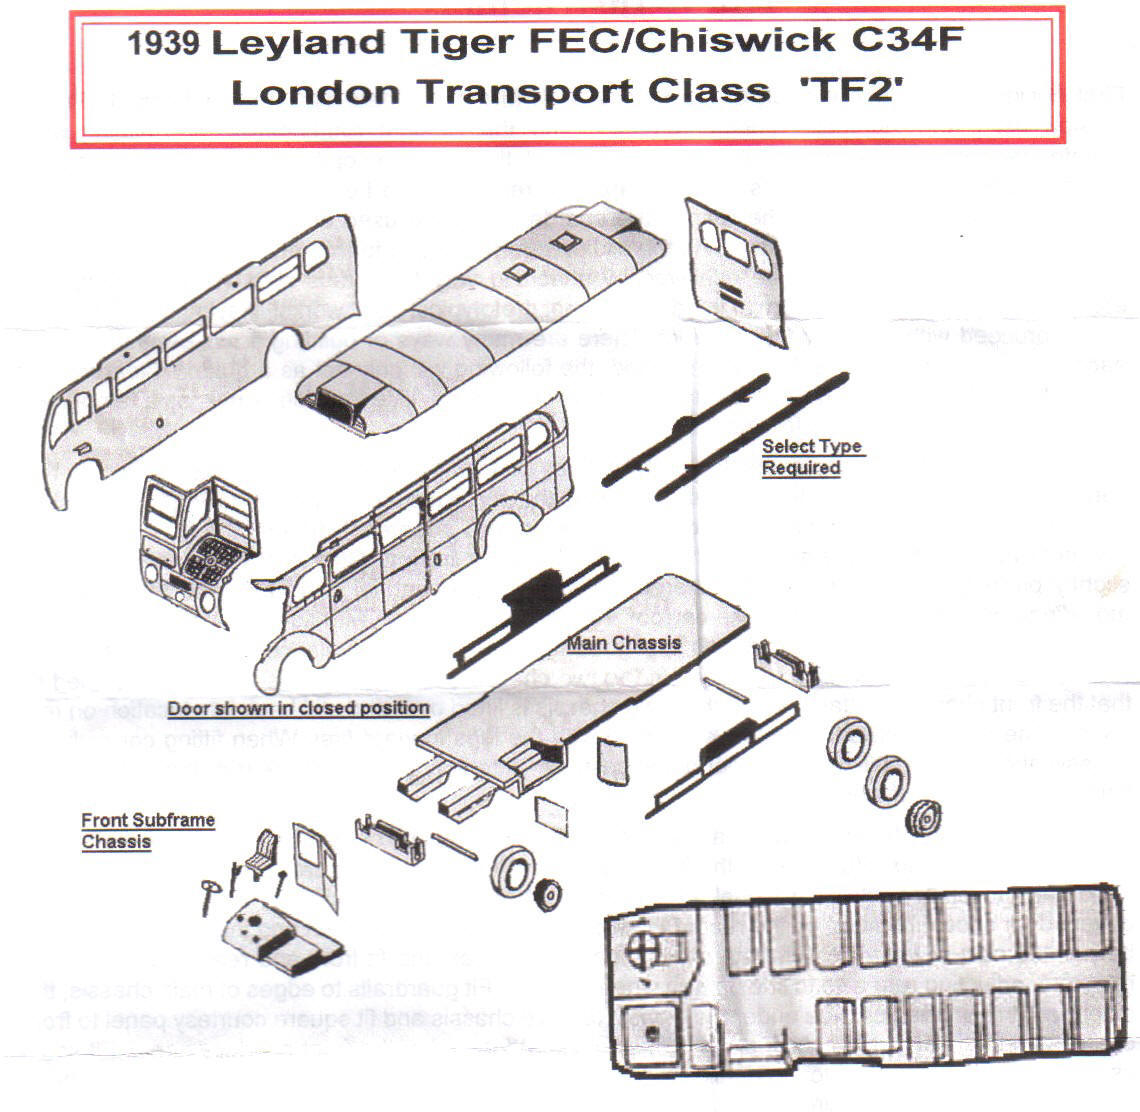
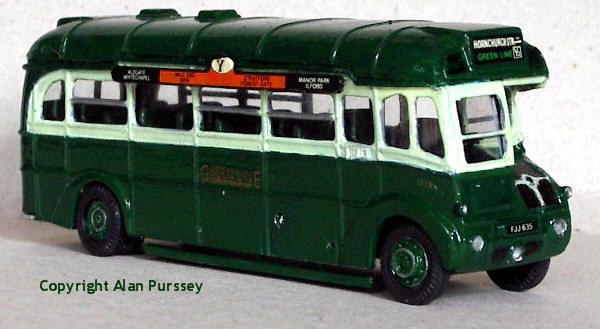
1939
Leyland Tiger FEC/Chiswich C34F
London Transport Class 'TF2'
- RTC Models KIT NO. 41
Review by Alan Purssey
 Recently
RTC revealed a list of forthcoming models; the first of these is now in
stock. KIT NO.41 Leyland front entrance coach LT class TF to follow the
recently released model in resin by the M.B.C.
Recently
RTC revealed a list of forthcoming models; the first of these is now in
stock. KIT NO.41 Leyland front entrance coach LT class TF to follow the
recently released model in resin by the M.B.C.
This model is in the medium of white metal, preferred by some modellers to the resin models.
Warning white metal contains lead and should be handled with care - ensure you wash your hands after handling.
This kit is not recommended for a novice modeller, however if you have ever built a model from Airfix or Revell then your skills could extend to building one of these white metal kits.
 I
covered the history of these vehicles in the
review of
the M.B.C. version and do not intend to repeat myself here.
David Eden of RTC Models has been producing high quality white metal
kits in 1/76 scale now for several years and is well known for his
highly detailed London bus models.
I
covered the history of these vehicles in the
review of
the M.B.C. version and do not intend to repeat myself here.
David Eden of RTC Models has been producing high quality white metal
kits in 1/76 scale now for several years and is well known for his
highly detailed London bus models.
This model contains 29 parts with full and detailed assembly instructions plus an exploded diagram, "do follow these".
Two styles of route boards are included to make one of three versions. The hump style for the pre-war version, and the straight board used after the war, or the country area, when the boards were omitted.
Another feature of this model is the sliding door; a separate item to enable the model to be built with the door in the open position, closed or even made to slide using thin copper shim from an etched set.
 Rubber
tyres are included; this does make wheel painting a much simpler
operation.
Rubber
tyres are included; this does make wheel painting a much simpler
operation.
The body shell is in five parts; the front section is in one piece for ease of building.
These models are designed for the body shell to be built first and the chassis to be fitted last. The instructions do recommend using the chassis unit when assembling the rear and side panels to ensure a snug fit.
The exploded diagram shows the seating position; these come separately with the two courtesy panels the square one to the front and the curved one to the rear of the steps. Remember when fitting the seats to leave a slight gap to accommodate the glazing material. The driver’s partition is be fitted in the grove behind the drivers seat.
 The
chassis comes in two parts the forward section contains the drivers cab
position with holes drilled for the drivers seat, steering wheel column,
brake handle, and gear stick, which is fitted to the front of the
chassis.
The
chassis comes in two parts the forward section contains the drivers cab
position with holes drilled for the drivers seat, steering wheel column,
brake handle, and gear stick, which is fitted to the front of the
chassis.
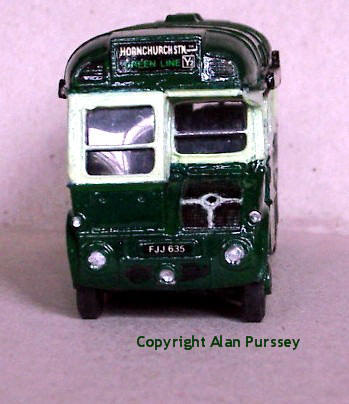
External details are excellent David always goes that little bit further; the door handles are moulded on and after painting can be scraped with a scalpel to simulate the bright work. If you wish to model the early pre-war version you will need to file off the double arrow indicator off the back panel below the emergency door these were added later. Once again the radiator detail with the bulls-eye motive is very good and David’s tip is to tape over this area before priming and painting to avoid obscuring the minute detail then painting the grill area with a mat black wash.
Cut the glazing material before you start assembling and put aside. It is simpler to paint the interior at this stage, and any touching up can be done after the model is assembled.
With casting in rubber moulds you will never get two parts to fit exactly the same, so do try a dry run first to ensure parts fit snugly together.
On my model the parts were cast clean and needed very little use of the file.
Once the body shell is complete offer the chassis flooring into the body to ensure a snug fit a pair of lugs at the rear are provided for it to slot into.
 There
is a lug on the nearside interior to the front of the sliding door be
careful this does not foul the front seat, other wise the chassis will
not sit level.
There
is a lug on the nearside interior to the front of the sliding door be
careful this does not foul the front seat, other wise the chassis will
not sit level.
Before assembly decide which version you intend to build If you choose to model a Greenline version then you will need to drill two small holes using the lugs moulded to the reverse of the sideboards as a guide, this is best done before the start of assembly. Or if you wish file the lugs down and glue them, but this is the last stage after completing your model and painting and decals have been applied.
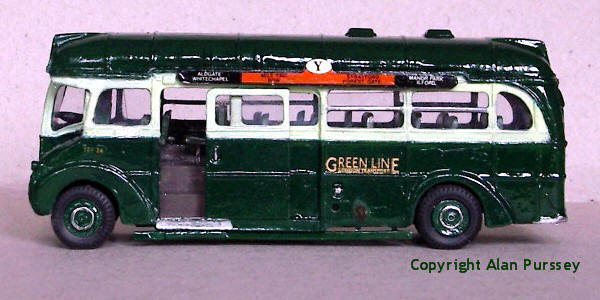
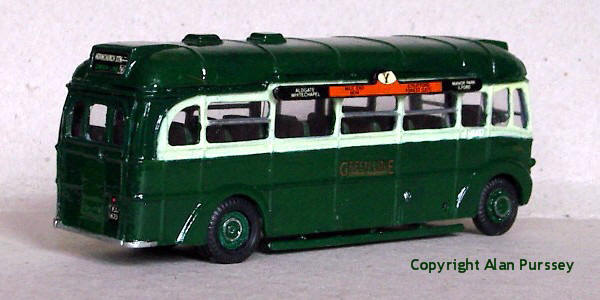
My model is finished, as it appeared in 1939 with the hump back side- boards on route Y2 with decals that I have had for some years. Decals are available from Mabex and L.B.R.T. to complete your model.
With a little patience this makes up into a fine model and I now look forward to the private hire version to complete this unusual but revolutionary class of bus.
RTC Models has now ceased trading.
Alan Purssey