Providing photographs for model manufacturers
How to provide information for model
manufacturers
Campbell H. Morrison
Taking STANDARD ANGLE photographs for model manufacturers
Writing to a model manufacturer
I am sure that anyone with sufficient interest in
pushing a potential model to any, each or all of the major players
should present a suitable business case for the model by providing
the manufacturer with a portfolio of photographs and written
evidence that it would be a suitable item to produce.
I would suggest that, while this portfolio could be emailed to the
chosen manufacturer(s), it should, or indeed MUST, be followed up -
preferably timed to arrive the same day or as soon after the email -
with a written presentation sent by courier that should also be
SIGNED FOR on arrival. Many large companies have SPAM filters that
might suck your email in to that filter, and it could be lost for
ever.
(NOTE: Your portfolio package should NOT be sent by Royal Mail if
being sent to Hong Kong addresses for Britbus or CMNL as Royal Mail
will only track within the UK. You need a courier service such as
UPS or DHL that will track your package OUTSIDE OF the UK).
What sort of photographs should be taken?
Obtain all-round, general and detail photographs to assist in
preparation of the pre-production prototype model.
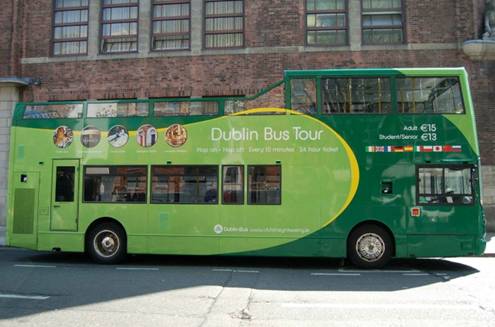
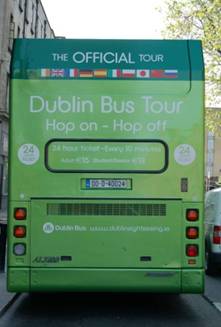
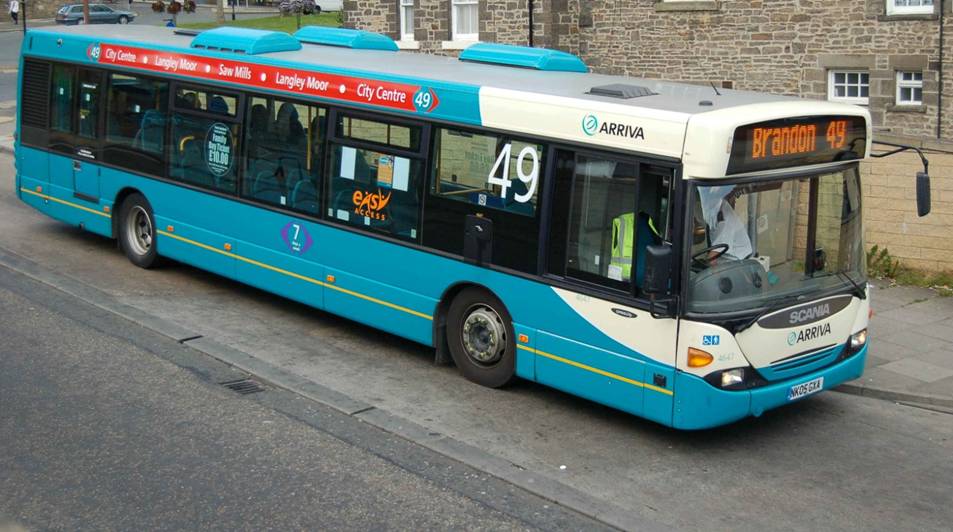
“All round” would include straight-on side, front and rear views
from distance to show livery layout in relation to panel joins,
beading and windows etc. Using a local contact first can be useful
if you prefer to take photographs within a depot rather than
outside. Detail photographs should be take close-up and should be
STANDARD ANGLE.

Q: WHAT is a “STANDARD ANGLE” photograph?
A: It is a photograph that is taken of some bus detailing that is
taken perpendicular to the vehicle side (rather than at any sort of
oblique angle) and level to the height of that detailing.
Q: WHY is a “STANDARD ANGLE” photograph necessary?
A: It is the preferred method of acquiring the necessary
information for the production of the tampo films. In addition to
STANDARD ANGLE photographs, a detailed commentary should be provided
to highlight the detail within the photographs, as well as some more
general photographs to show the location of this detailing within
the rest of the bus – i.e. in relation to windows or to panel joins so
that the detailing can be placed in the correct location.
Q: How do you photograph detailing on the upper deck of a
double-deck bus?
A: Either use a telephoto lens to ensure that, if you are standing
at ground level, the angle is flattened as much as possible, or use
a second double-deck bus to take photographs at eye-level to the
detailing.
Part One – exemplar photograph sets
The examples in this first part show the sort of
photographs that should be taken. The photographs should show a
general view of the area surrounding the detail that is being
photographed as well as a close-up view of the detailing.
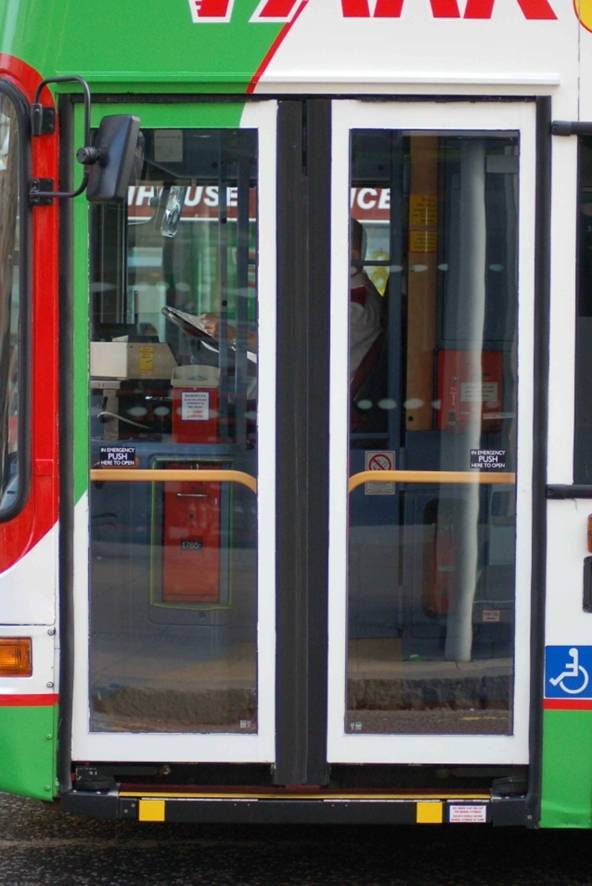
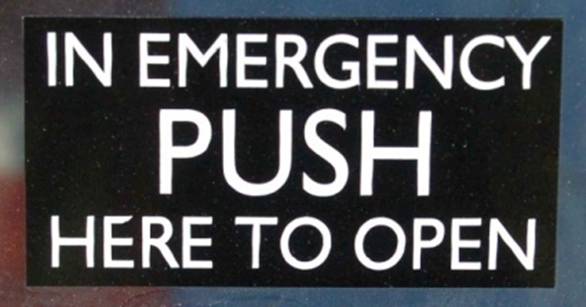
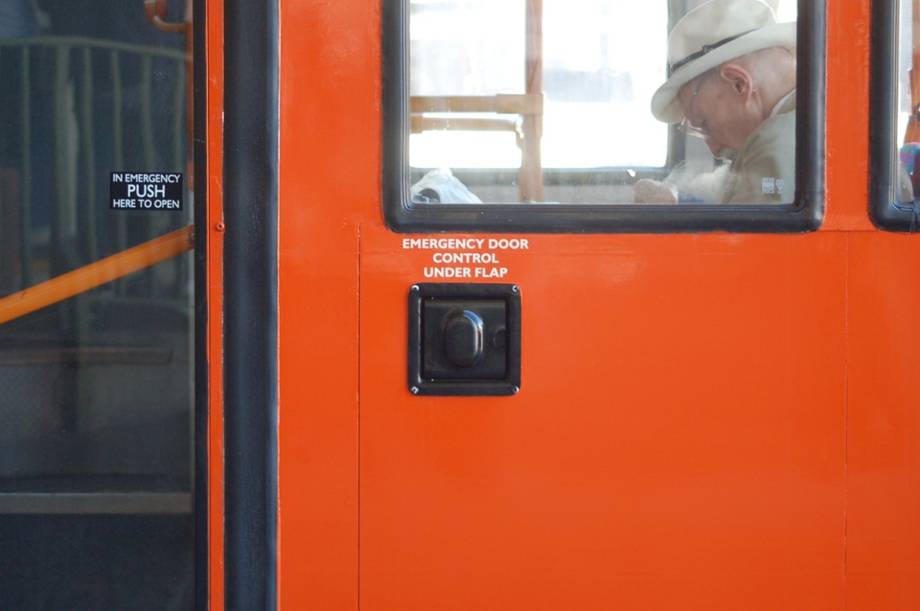
Set 1: The detail that is needed is the lettering “IN EMERGENCY PUSH HERE
TO OPEN” and this is shown in full close-up, but a general view of
the doors is also provided to show where these two stickers should
be placed, and also to show their size relative to the surrounding
glass, hand poles etc.
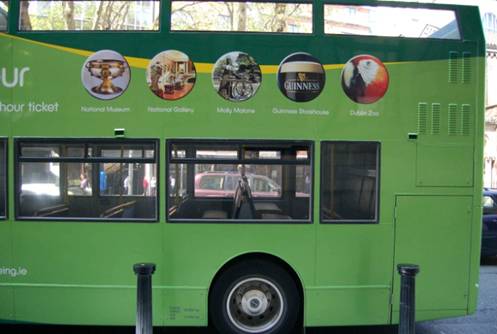
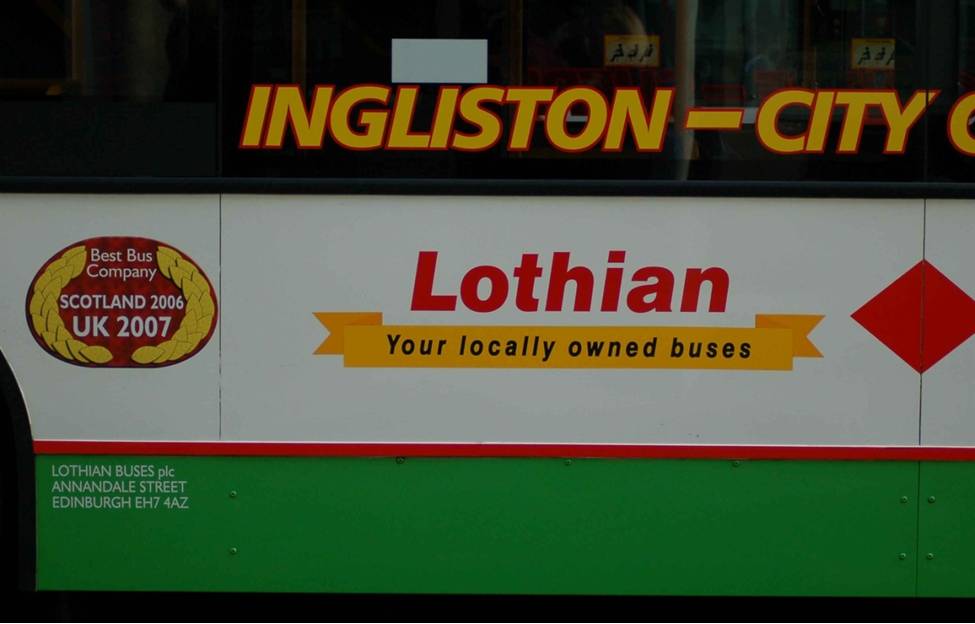
Set 2: As well as an accompanying set of close-up photos of the individual items (below left), the general view (below right) would accompany the photograph set. Detail views (as below) show clearly where each item is placed in relation to other items and the panel joins.

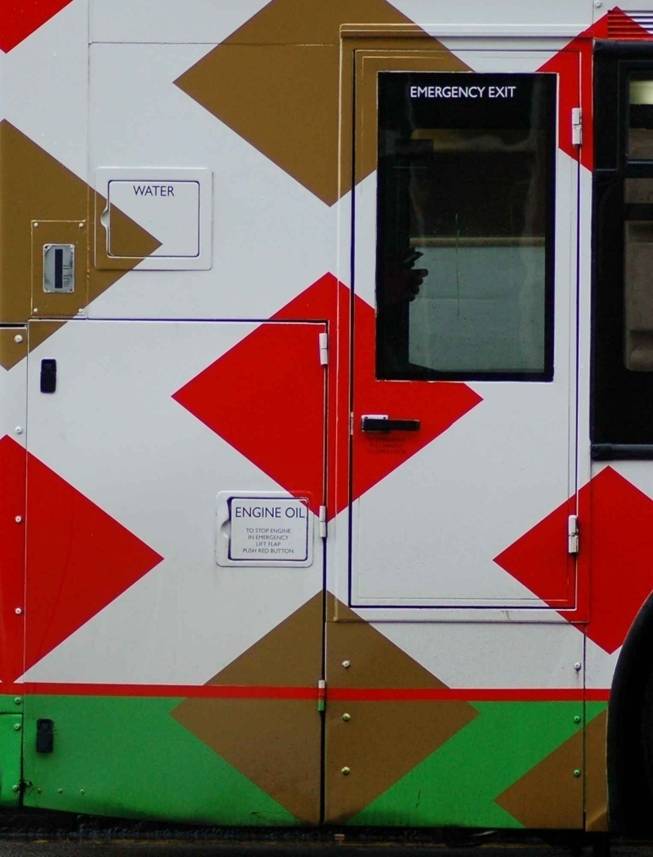
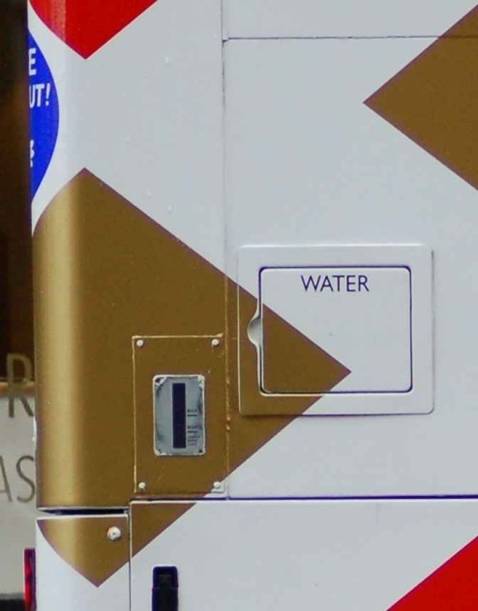
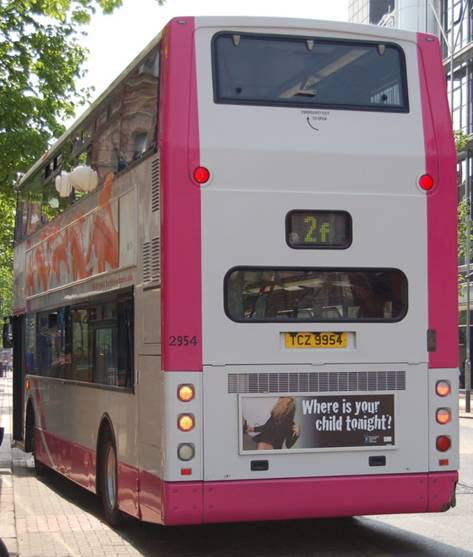
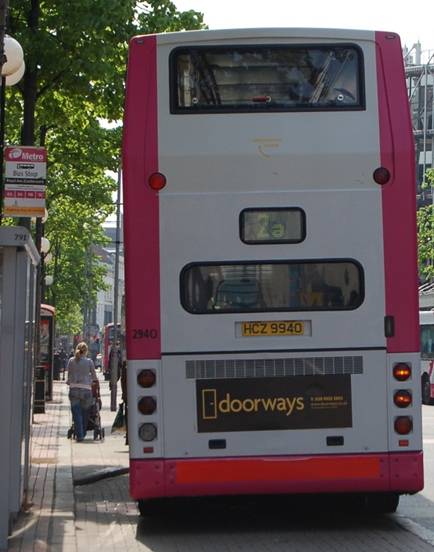
Set 3: This set of photographs shows the general view of the area where
the detail close-ups come from and also, for your guidance, is an
exemplar of the sort of accompanying notes that should be provided.
Emergency door and engine access doors:
“EMERGENCY EXIT” in WHITE on BLACK at top of
emergency door window
WATER on access door rearward of it
Water sight glass set into gold harlequin
ENGINE OIL access door within engine access door + additional
lettering “ENGINE OIL // TO STOP ENGINE // IN EMERGENCY // LIFT FLAP
// PUSH RED BUTTON”
Emergency lettering under emergency door handle – “IN EMERGENCY PULL
HANDLE TO OPEN DOOR”
General view for location of detail:
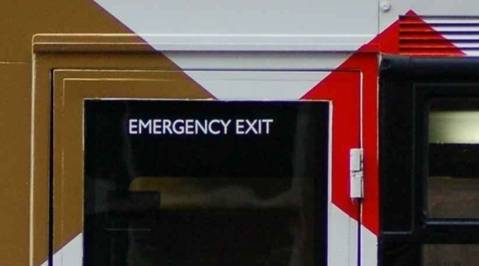
Close-up detail:

Part Two – Standard Angle and non-Standard Angle
photographs
Below is a set of photographs showing what IS and IS
NOT a STANDARD ANGLE photograph
Example 1:
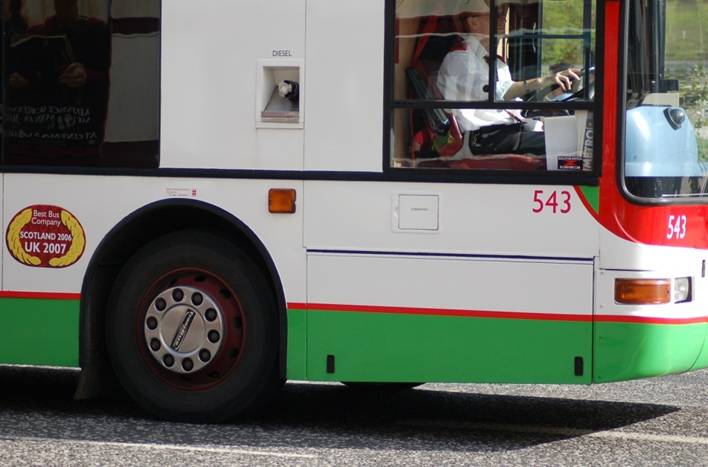
Although OK for a “general” view to show location, the detail is not straight on and it involves the factory in taking longer and making more effort to extrapolate the information and detail work to make it suitable for making the tampo films. In doing so, the quality of an image can be destroyed and its suitability to be used for the films can be useless, thereby creating further delay and expense if the lettering etc has to be created from scratch.

This view is straight-on and would be more suitable
for factory use, although the detail work should be photographed in
true close-up (like the door lettering at the very top of this
article).
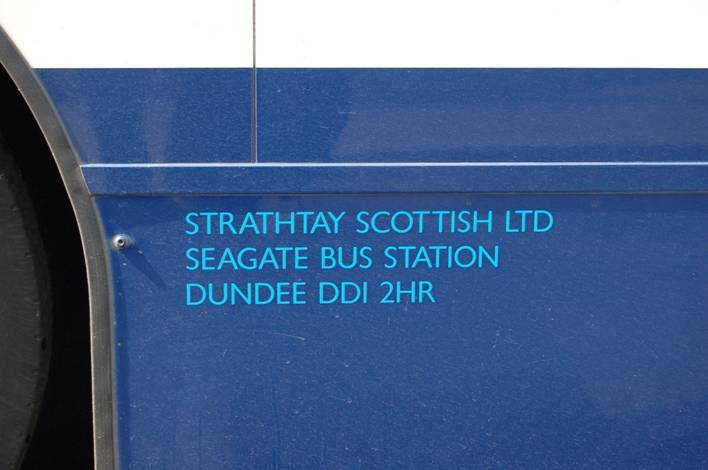
Example 2:
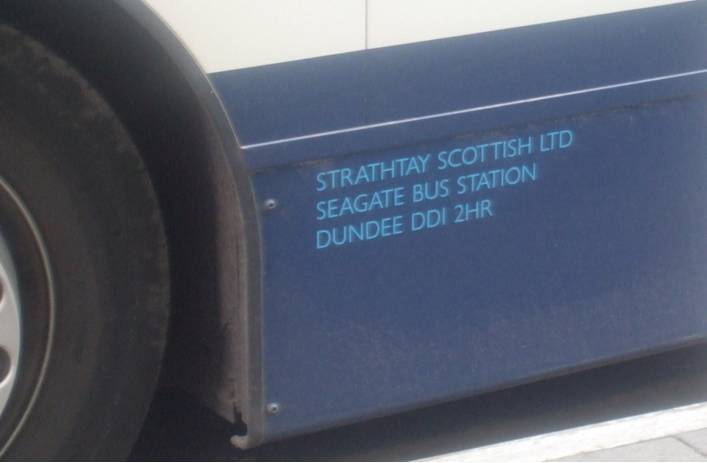
The legal address lettering has been photographed from above and too far to its left. The amount of pre-production manipulation required to obtain the tampo films would probably cause the image to break down and to be of little, direct use.
The choice of camera CAN have a huge bearing on how
easy or difficult it is to photograph the images successfully.
Although this image looks to be a proper standard angle, it has been
taken slightly from above, though probably not too much of a problem
to correct to make the tampo films. In this case a digital SLR was
used to take the photograph requiring the photographer to bend down
near to ground level – not too easy for those of advancing years or
with a back injury to contend with.
Example 3:
2 general views .....
Although useful to the manufacturer in showing
locations, the left hand image above would not be a suitable
starting point for the photographer to start taking detail close-ups
as the angle is oblique. The right-hand image should show where, in
relation to the subject matter, the photographer should stand to
obtain the close-up detail work and lettering.
Part Three – Camera equipment
Any camera should be suitable for providing the
images that are required nowadays by the manufacturers, though
cellphone (mobile)
cameras should be avoided unless of the highest
quality.
An SLR camera should offer better results – especially when a
telephoto lens has to be used to flatten the angle for photographing
close-up detail on the top deck of double-deckers. The main
disadvantage of the SLR is that, generally, the photographer’s eye
has to be up against the viewfinder and this limits the ability to
photograph with the camera set high above the photographer’s head
(for fleetnames etc) or below the waist or knee level (for legal
address etc).
The non-SLR digital camera (especially with a flip
screen) offers a better opportunity to get to “eye level” with the
detail that is to be photographed – either above head height, or
below waist or knee level. However, when using the telephoto
facility on this type of camera to “flatten” the angle to obtain
high level detail on a double-decker, the detail can break down once
the limits of the optical zoom is exceeded and the digital zoom
takes over.
Example 1
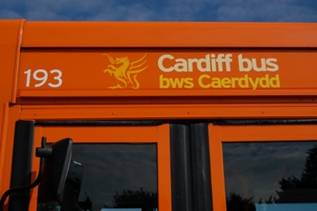
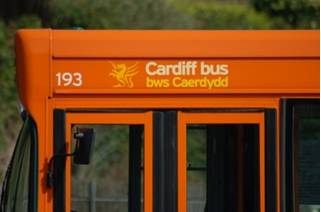
Photo (above left) taken with standard lens on Digital SLR but pointing upwards from too close to the subject, therefore at an oblique angle and NOT at STANDARD ANGLE. Quality of image is good but, in making the tampo films, this may suffer as the image has to be manipulated. Using a non-SLR digital camera above the photographer’s head (above right) would give a clear image and at a STANDARD ANGLE

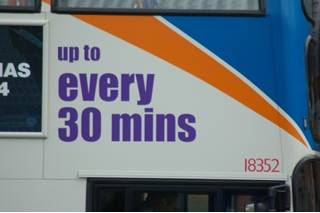
Photo (above left) taken further away from subject but at full
telephoto zoom so image is slightly degraded – assisted by the
over-bright sunshine (a slightly clouded day can reduce contrast and
improve saturation).
Angle (above right) is more flattened and suitable as a STANDARD ANGLE photograph
Example 2:
Part Four - Further advice
1: “GET UP CLOSE”
Although taken as a STANDARD ANGLE shot, the
photographer is too far from the door lettering for the image to be
CLEAR and WELL DEFINED when it has to be enlarged to make the tampo
films.
Sample A (below left) shows the door lettering cropped from this
photograph (above) but subsequently enlarged to the same size within
the frame as the close-up photograph of the same lettering as shown
in Sample B (below right).
In the enlarged image from the photograph immediately above (below
left), the white lettering is fuzzy, lacking clarity and definition
whilst the black background is snowy and greyed rather than a well
contrasted black as in the original image that was taken as a
close-up and as shown without any cropping (below right).


2: “LED Destination displays”
Some LED destination screens render fully and brightly when
photographed but, depending on the shutter speed, they can alternate
with dimmer rendering, or with nothing at all (for example many
Stagecoach ones). Others only come out in “lines” – notably many of
those that are retro-fitted – especially the green ones! So, be
prepared to have to take multiple images in order to get full
coverage of the screen.
Also, be careful to try and get an even light on the glass screen –
preferably a black building behind the photographer should provide
the best contrast and try to avoid trees or other items that will
not give an even shadow on the glass (the Strathtay ALX400 is an
example of a “split” shadow
AND
it has rain on the glass which can cause distortion when the image
is being copied for the model).
LED examples:
Below left: a Stagecoach Strathtay destination that alternates from
bright > dim > blank
Below right: a Go North-East Citaro showing the “lines” effect on
the numerals.

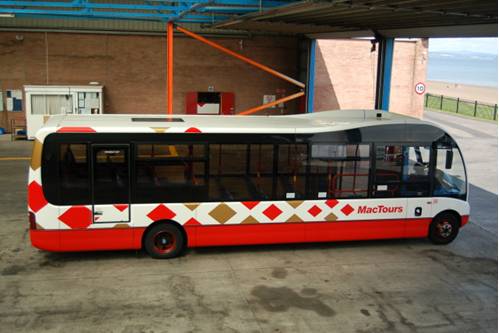
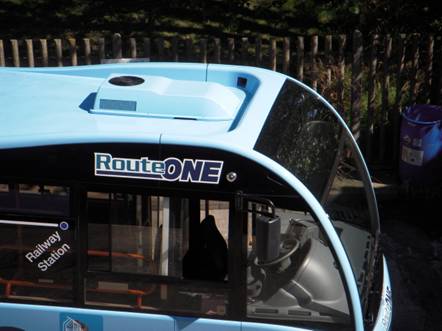
3: “Don’t forget the roof”
Q: What is often overlooked, yet is rarely overlooked?
A: A bus roof
Whilst there are so many opportunities in
Hong Kong
to view bus roofs due to the high incidence of tall buildings, in
the UK bus roofs are more likely to be overlooked when a bus
enthusiast takes photos, or when someone wishing to propose a model
to the manufacturers takes photos.
Yet, a bus roof can be a minefield of unexplored detail – whether it
is the application of the livery, or the plethora of aerials or air
intakes.
So, don’t forget to photograph the roof of your proposed model bus
.... whether it is from the top deck of an open-top bus (how I
photographed the Mac Tours Solo SR) or from the upper level of a car
park (how I photographed the ONE Solo SR) or from a footbridge
across a road.
Copyright:
No part of this article may be reproduced in any form or by any
means, without the written permission of Campbell H. Morrison
Falkirk
August 2009