Model Photography – some hints and tips
Click on the pictures for the full-sized images, and then open
the new window fully to appreciate them at their best - hovering the
mouse over the pictures should (depending on your browser, perhaps)
indicate their picture numbers.
Georg Hämel writes:
First let me say that this is far from being a guide for good photography, it’s just some of the things I found out over the years. English is not my native language, so I hope that I nevertheless manage to make myself clear. Please do not hesitate to contact me at info@londonbus.me.uk if you have any questions or some specific problems that are not mentioned here!
1. Some notes on the equipment
Well, obviously a camera is essential for taking photos and I would
recommend buying a camera with a good macro mode. The macro mode range is given in
the camera’s technical specifications and ideally it should be 5cm at
telephoto, that means, that the camera will be able to focus on objects
as close as 5cm in macro mode. Even better are cameras that offer
something that is called a “super macro mode”, this enables the camera
to take sharp photos of objects 1cm in front of the camera – very useful
for extreme close-up photos (see picture 1)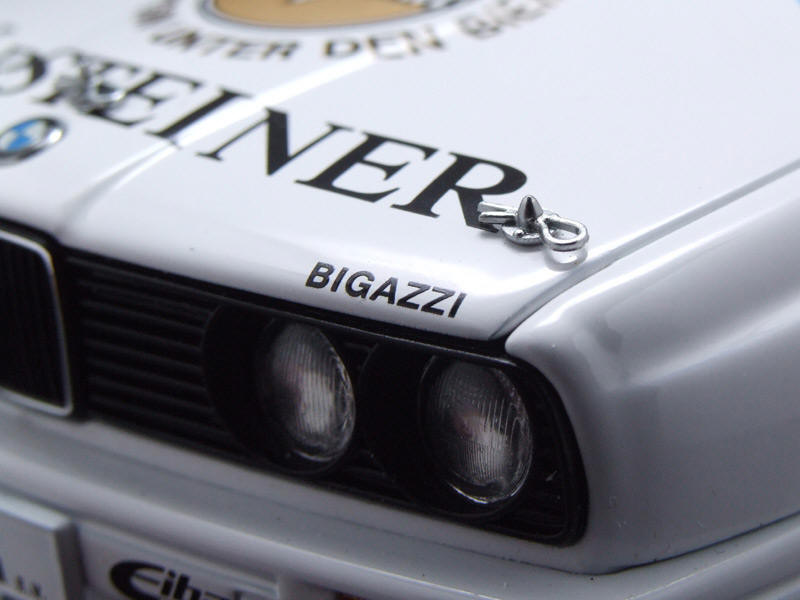 .
I would also recommend a camera with a reasonable optical zoom, most
offer a 3x zoom which should be sufficient. Having a camera that offers
the possibility to choose the aperture settings manually would be the
“icing on the cake”, the advantages this offers will be explained later.
.
I would also recommend a camera with a reasonable optical zoom, most
offer a 3x zoom which should be sufficient. Having a camera that offers
the possibility to choose the aperture settings manually would be the
“icing on the cake”, the advantages this offers will be explained later.
The “mega pixel” numbers can be largely ignored. If you do not want to mainly show your photos on the web and are interested to make real photo prints of your shots in sizes larger than 10 x 15 cm (6 x 4 inches) a 3 or 4 MP camera will do and might even be available at a reasonable price and with better image quality than some of the 6 or 8 MP compact cameras. If you are looking for a new camera and would like to have some information on the models available, take a look at http://www.dcresource.com – an excellent site offering loads of information, very good reviews and very interesting sample photographs for most cameras.
I would also recommend getting a tripod. If you have a camera that lets you choose aperture and shutter settings I would even say a tripod is essential for taking good photos. It does not have to be a high-tech professional tripod.
One of the best things about digital cameras is - undoubtedly - that you can take as many shots as your storage card can take and it does cost you nothing. To get the best out of this advantage I would recommend getting a large storage card to ensure you will not run out of space during your photographic experiments.
2. Background information
There are many different reasons why you might have the wish to take
photos of your models. The most common nowadays is showing them on the
internet, e.g. in a Fotopic web gallery or on your own website but there
are several others. So before you start taking photos you should ask
yourself a very important question: What would you want the photo to be
like? Do you want your model to look very life-like? Do you want to take
a photo on a simple background to just show the model and nothing else?
Do you want to take a photo for selling the model - e.g. on eBay?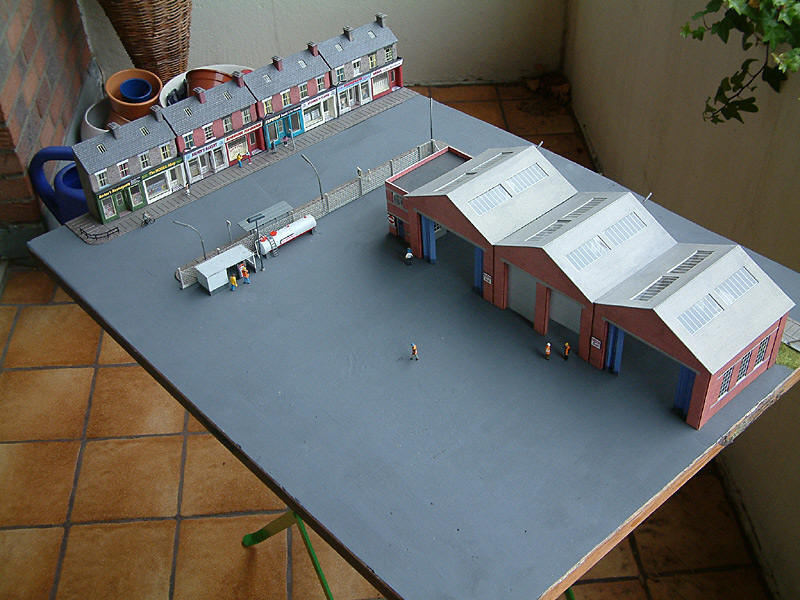
Making models look like the “real thing” is best done on a diorama, especially when we talk about models of huge vehicles like buses. Cars are often photographed in photo studios so you can do rather realistic car model photos on simple backgrounds but buses look best in some “natural” surroundings like a street scene (see picture 2). If you do not have a diorama at hand – and, believe me, it is very simple to build one just for photo purposes – a calendar or photographs in a reasonable size can also look good and add a certain level of realism.
Photos of dioramas look even better if you try to blend the
diorama in with the real life background. This can lead to astonishingly
realistic effects!
(see picture 3)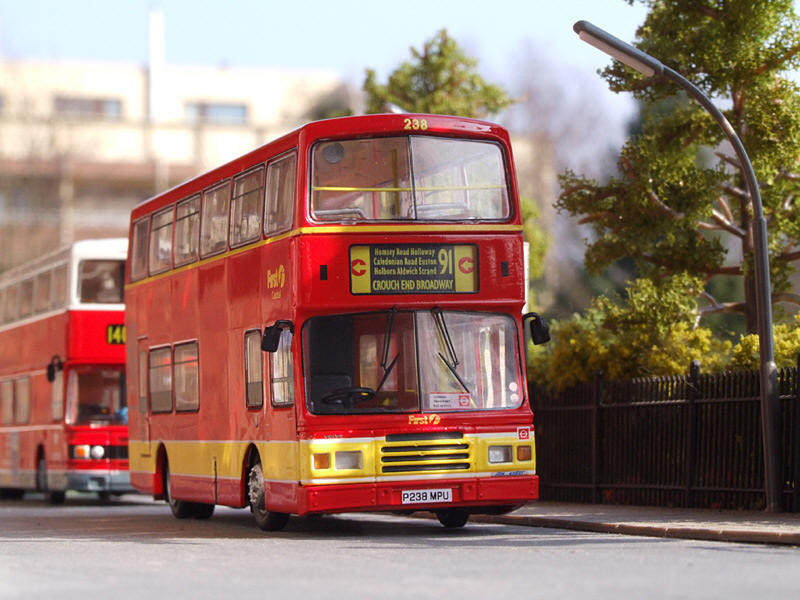
If you are not after a realistic look and your aim is for a good photo of the model you should choose a neutral background. Most people go for a white background but this has some disadvantages. It requires a properly set white balance otherwise the background will appear a bit reddish or have a yellow or blue shade. In this case you can do a manual white balance if your camera has this feature. You need a piece of white card which you put 10 cm in front of your camera lens, choose “manual white balance” or whatever it is called on your camera and press the shutter release button. Your camera should tell you if the white balance was successfully set. Do not expect it to work first time, in most cases it takes some experimenting.
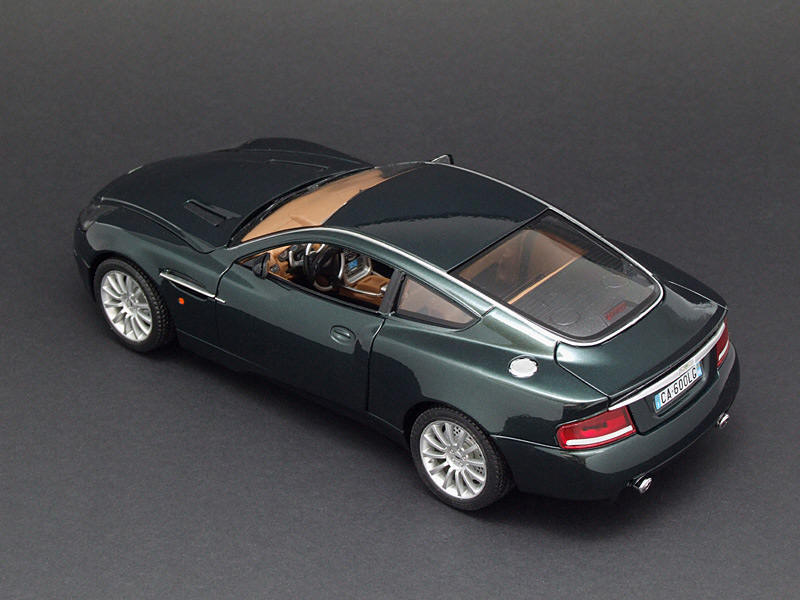
You can avoid this problem by choosing a different colour as your background. I tend to use grey or – especially nice – black card for the background (see picture 4). Black adds a touch of “style” to the photos but takes away a lot of light, so you should have a kind of stage made of white items ready, e.g. a big cardboard box cladded inside with white card or what some people call a “light tent” which is a box of wood or metal with white cloth used to reflect light or soften a lamp directly positioned above it.
 (As
at September 2006 Maplin Electronics sell a very useful “Portable Soft
Lighting Studio” in the UK for around 20
GBP:
http://www.maplin.co.uk - Ed.)
(As
at September 2006 Maplin Electronics sell a very useful “Portable Soft
Lighting Studio” in the UK for around 20
GBP:
http://www.maplin.co.uk - Ed.)
3. The camera settings
I would recommend taking photos outside using daylight as your light
source, as this will avoid any colour difficulties. In my opinion a
lightly clouded sky is perfect for photos as I do not like the harsh
shadows caused by direct sunlight. The heavy shadows highlight body
joints and shutlines and make the model look like just that – a model.
The softer light on a cloudy day gives a more even look to the surfaces
and joints and produces very realistic photos.
Dark areas on a model can not be avoided, however. The area not directly exposed to the light will always look a bit dark, to lighten this up I use sheets of white card as brighteners. These should be held in front of the dark area at a suitable angle for maximum light reflection. This angle can only be verified by taking a look at the model through the viewfinder and testing different angles with the card (and this is an excellent reason for getting a tripod – it can be quite difficult to work with the brighteners and the camera at the same time…).
Always choose a low
camera angle when taking model bus photos. While a high camera angle can
look excellent on car models it does not work with buses. Take a low
angle imitating the real life eye-level compared to the model, this will
greatly increase the realism of the photo
(see picture 5)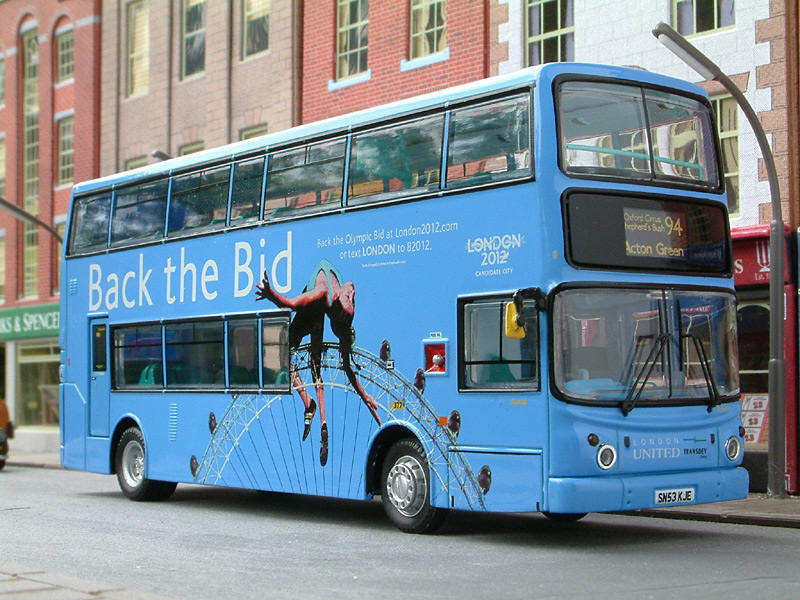 .
.
I recommend using the macro mode of your camera for taking photos of models under a scale of 1:32 as only the macro mode will show all the fine detail on your models in satisfying quality. On most cameras the macro mode does however have a huge drawback: Very limited depth of field (which is the distance on a photo in front of and behind the object that is “in focus” or sharp). The depth of field depends on the aperture setting of the camera. Simply spoken the aperture is a device in the lens that regulates the amount of light that reaches the image sensor. The more open the aperture is set the more light gets inside the camera and the less depth of field can be seen on the photo – only the area the camera has focused on will be sharp, the rest will be more or less blurry. Likewise a closed aperture will result in a high depth of field, so this would be what most model photographers will like to achieve. A closed aperture does have a major drawback, though. Closing the aperture means less light on the image sensor and so a slow shutter speed must be chosen which will cause you some trouble if you do not have a tripod or a built in image stabilizer in your camera.
The aperture setting is measured with f-numbers, a low f-number
(e.g. f2.8) denotes an open aperture while a high f-number (e.g, f11) is
a closed aperture for high depth of field
(see picture 6)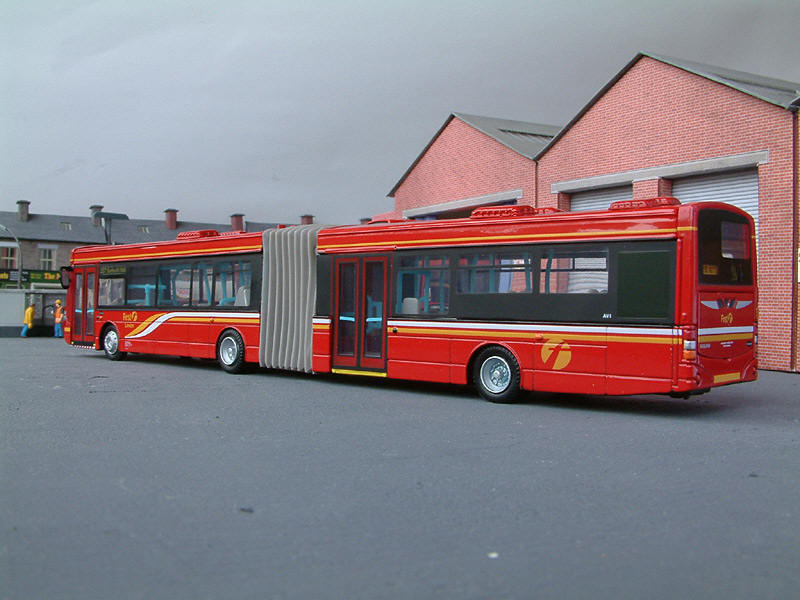 . It is also important to note, that the macro mode also requires
higher shutter speeds due to the lens arrangements that take some light
away, so you can see why I recommend getting a tripod - you really need
one for a macro photo with closed aperture without any shake problems.
. It is also important to note, that the macro mode also requires
higher shutter speeds due to the lens arrangements that take some light
away, so you can see why I recommend getting a tripod - you really need
one for a macro photo with closed aperture without any shake problems.
The problem here is, that on most compact cameras you can not choose your aperture settings and so you have to face the fact that the depth of field will be rather limited. You could probably try two things:
- Do not focus on the front of the model but a bit more behind. Sometimes the aperture setting will be enough to show the front reasonably sharp and the rear end will not be too blurry. The blur that might be visible can be corrected in a image processing software later.
- Do not use the macro mode but move a bit further away and try to zoom in. Cameras always use higher f-numbers outside of the macro mode.
A limited depth of field can also be used to our advantage to
highlight details on the model or to give your scenery more depth
(see picture 7)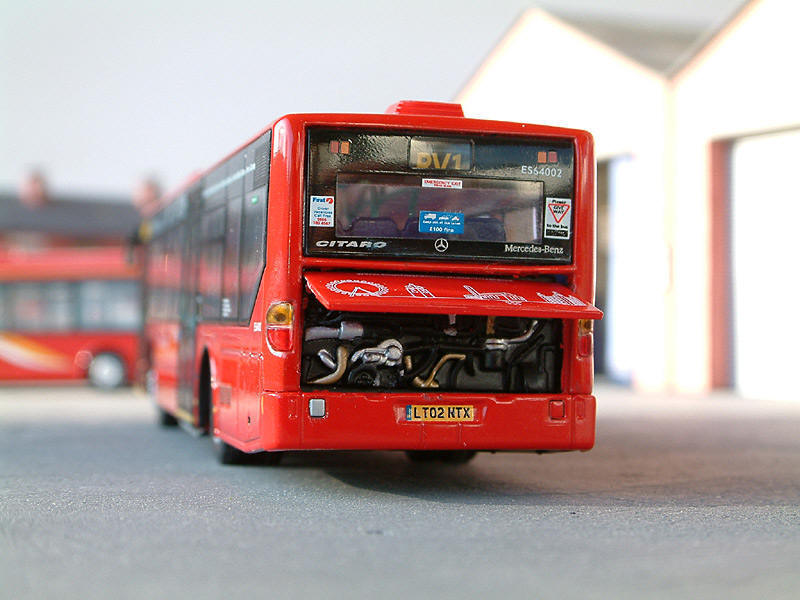 . A large depth of field can make the image seem a bit “flat” when
taken on a diorama or in front of a special background so try some
different aperture settings to find out how to use them to the best
effect.
. A large depth of field can make the image seem a bit “flat” when
taken on a diorama or in front of a special background so try some
different aperture settings to find out how to use them to the best
effect.
The shutter speed is measured in seconds and parts of a second. Most cameras offer selectable shutter speeds between 1/1000s and 15s and you should experiment with those settings to find the one that suits your lighting and your environment best. For cloudy daylight shooting with f5 you should start with 1/125s.
On more advanced cameras you might be able to choose from several operation modes like “P”, “A”, “M” etc. You should try “P”, as this is basically a fully automatic setting that lets you choose several combinations of shutter speed and aperture; otherwise I would recommend using the manual mode (“M” or whatever it is called on your camera). This will give you full manual access to all settings and will enable you to try different aperture and shutter speed settings yourself. You might understand now, why I recommend a large storage card?
So, recapitulating: For a large depth of field you need a large f-number (= a closed aperture) and a slow shutter speed. Use a brightener to bring light into those shadow areas you want to be lighter. I would highly recommend doing many shots with different settings, so you can find out when looking at the final results on your computer which camera settings gives the best result. You can find all camera setting details in the image’s EXIF data which can be extracted in image processing or viewing software like IrfanView and others.
4. Indoor photography
If taking sharp and focused photos outside with large depth of field is
difficult without a tripod , it is virtually impossible to get good
results indoors without one. The main problem indoors is of course the
light or the lack of it. You could choose to get some daylight bulbs for
some lamps that will be used as studio lights for your photos. These
bulbs have the advantage that they do not require a manual white balance
on many cameras as their colour temperature matches that of daylight.
The less pricey alternative is some powerful lights, for example some
halogen spotlights. These require a manual white balance but are much
cheaper and if you build yourself some light softeners or use them for
indirect lighting they can give you very decent results. All photos with
these light sources do require slow shutter speeds and you should use a
tripod and the cameras self-timer function to ensure that not the least
bit of shaking will occur.
You might also be tempted to use your camera flash but, please, don’t. Direct flash results in the same harsh shadows as direct sunlight and especially when shooting in macro mode the flash is far too powerful for the small distance. If you can manually choose the flashes power you can try to experiment with different settings but I would recommend getting some lamps instead – the results will be far more satisfying.
The only alternative would be an external flash if your camera has
a hot shoe. Get one with a moveable reflector so you can use it for
indirect flashing. This means that you direct the flash e.g. on the
(preferably white) ceiling and the reflected flash will be very soft and
will give a great look to the object
(see picture 8)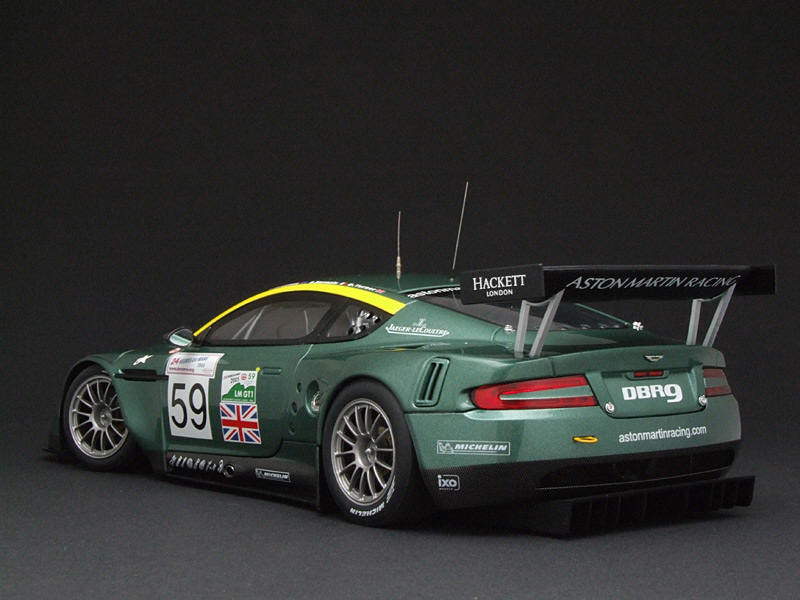 . On external flashes you can choose the flash power settings
manually and I would advise you to spend some time experimenting on
these to find the right setting for the right shutter speed and
aperture. The great advantage here is that much faster shutter speeds
are possible and that you can take sharp and focused photos without a
tripod.
. On external flashes you can choose the flash power settings
manually and I would advise you to spend some time experimenting on
these to find the right setting for the right shutter speed and
aperture. The great advantage here is that much faster shutter speeds
are possible and that you can take sharp and focused photos without a
tripod.
Brighteners, e.g. sheets of white card, are also highly recommended and I would also recommend building some kind of photo stage with plenty of reflecting surfaces for the light sources – be it lamps or a indirectly used flash. My stage is pretty simple: two white pieces of card, a large, curved white piece of card as the stage ceiling, on most occasions a curved black card as the main stage where the model is standing.
5. Image processing
Apart from taking as many photos as the storage card can take at no cost
the biggest advantage of digital photography is, that a photo can be
processed and changed afterwards using suitable software. Most cameras
have some kind of image software included, the most common are Adobe
Photoshop and Photoshop Elements, Ulead Photo Impact and the Microsoft
Digital Image Suite. All these are fine with Photoshop definitely being
the best and most professional one (and at 1,000 EUR a bit overpriced
for the home user). Image processing with these programmes is a topic of
its own and a far too complex thing for a few sentences of explanation
so I would just recommend to you to try the functions of your program
yourself and if you have a specific question, contact me at
info@londonbus.me.uk and I’ll see
what I can do.
So, just some basic notes on two important issues:
- Crop your images in the software, don’t use batch processing tools as they are always bad for image quality. If you upload the photos to some hosting space like imageshack.us or into a web photo album, try to upload them in the required resolution as all image processing done by those web tools will result in reduced quality.
- Take a look at the colour correction functions. All digital images are saved as RGB images, which means that they are colour coded for light colours (like computer displays). Light has three basic colours, red, green and blue and all other colours are derived from mixing amounts of these three. If your software allows you to edit all color levels separately you can correct colour errors by reducing the brightness of the respective colour level (e.g. if there is too much blue in the image, make the blue level darker) .
If you miss something from these notes I would highly recommend
visiting
http://www.modelbuszone.co.uk/efe/trucks/phototips.html, a
section of Kevin Ellis’s well known and excellent EFE Zone for loads of
good hints and ideas: maybe he has the solution for your individual
problem.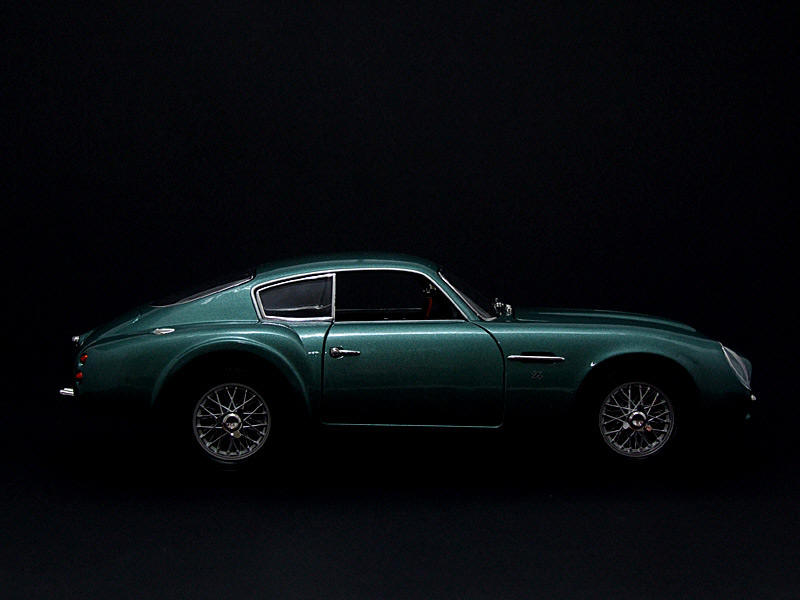
6. Some words of encouragement
All this technological stuff sounds quite intimidating but basically all it takes is experience. I started working on my photographic skills five years ago and I still am not satisfied with many results. Take your time and, most important, test different settings, try different angles and be creative! If your camera has some depth of field problems, try to use it creatively to highlight special details on a model. If you do not have excessive lighting for your indoor studio, try to use it in a way that highlights the basic lines of a model or play with the contrast of shadows and lights (see picture 9). You can do so much more than just snap a photo of a bus and the more interesting a photo is the more will people want to look at it and the more they will appreciate it, even if there’s “just” a “toy bus” shown..
So, try for yourself and have fun!
All text and images Copyright © Georg Hämel 2006
Georg Hämel’s London Model Bus page is to be found at http://www.londonbus.me.uk/.