
I've taken over 2000 model photographs during the building of this web site, and after a lot of trial and error, I've learned a few simple tricks that could improve your results.
My Equipment
I've had a number of emails asking how I took the model pictures on the site, and what equipment I used, well you might think I've got the latest 6 mega-pixel camera, special lenses and a studio full of expensive lights.
Well you'd be wrong, all the model pictures were taken on a 2.1 mega-pixel camera at a resolution of 1600 x 1200. The models were lit using natural daylight, and the cameras in built flash. The camera is a basic fixed focus model, and by today's standards is pretty low spec.
The stage was made out of several odds and ends, and a small tripod was used to anchor the camera.
 What You Need
The equipment you'll need consists of a digital camera with close up option, some white cloth or a large sheet of paper, a couple of bits of A4 sized stiff card, a table, and several thick books. A tripod does make things simpler, but I'll explain a work around, if you haven't got one.
The Best Location
The fist thing you need to do is find a location which has good natural light. Outdoors is probably the best, although direct sunlight can pose problems in terms of unwanted shadows.
I usually take my pictures indoors, near an open door, which gives me good natural light, and avoids problems with the wind, and cuts down on unwanted reflections.
 The Stage
For this article I'm going to keep thing simple and use a plain white background for the photographs.
The first thing you'll need is a table to use as a base, and some thick books or similar to produce an upstand behind your model, you'll then need some white material, such as a table cloth or a large sheet of paper, which should be draped over the books and table to form an even white background and base.
Now find a couple of sheets of white faced A4 size card (or tape a sheet of A4 printer paper to the sides out of a cereal pack. (This is getting more and more like a Blue Peter make!) Use one piece of card to produce an upstand along the end of or table furthest from the light source, this will be used to reflect some of the camera's flash back on to the model.
Now position your camera in front of the stage, use a tripod if you have one. see 'I Don't Have A Tripod' below if this is a problem.
Place the model on the stage you,ve built, so that when viewed though the camera, the background looks even and you can't see the end card.
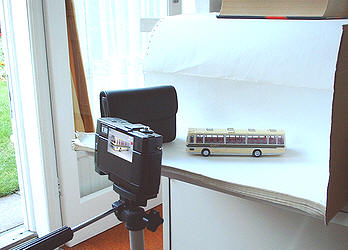
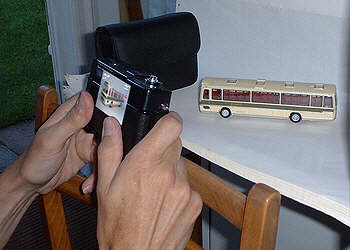
The layout of the stage, camera and model should reasonable something like the picture above right. Ignore the black camera case on the left of the picture for now, and imagine my old 35mm compact camera is really a digital model!
Right your stage is now ready, and your model is in position.
The first thing to do is to make sure you've switched the camera into it's close up / marco mode.
You now need to move the camera away from the model, a common mistake which is made is to try to fill the whole of the camera frame with the model, however most cameras with a fixed lens, even in close up mode can't focus on anything which is nearer than about 8 cms or 3 inches from the lens so move the camera back to allow for this. Make sure you have the cameras viewing screen turned on, the view finder is next to useless when using the close up mode.
Compose the picture by positioning your model and camera, then check the model for any unwanted reflections. The camera case shown above was used to block such a reflection on the models windscreen. You can use the other sheet of cardboard for this, but try not to block too much of the light falling on the background behind model, as this will result in a rather dreary looking final picture.
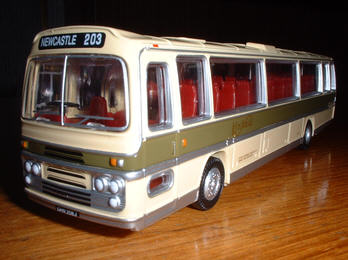
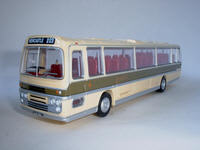
You should see something like the image on the right on your camera's display.
Now the tricky bit, most simple digital camera don't allow to choose the shutter speed or aperture settings, it's all done automatically. However we need a slow shutter speed and a small aperture to get a fully in focus picture of the whole model.
The trick is to force the camera to choose these, there are two ways, If your camera has a slow synchro flash setting (this is shown as an S followed by the flash symbol on my Fuji camera) then your in luck. I think this is a pretty standard feature on most recent cameras although it might be called something else on yours.
If you don't have this then you'll going to need the maximum amount of bright daylight, so you may need to wait for a sunny day and then move outside.If your using the flash read on, if you've only got daylight then move on to the next section.
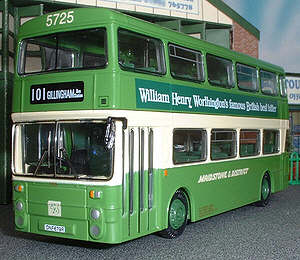
Select the synchro flash mode, do a final check to make sure the composition is OK, and then take your picture.
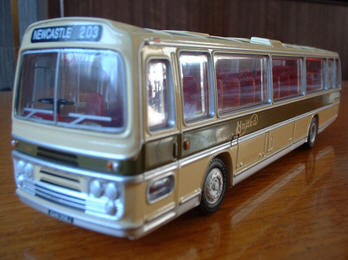
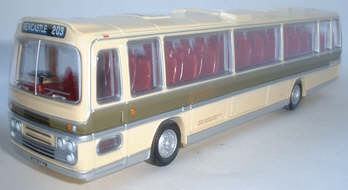
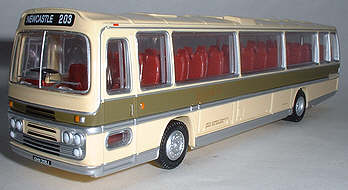
With any luck you should have a picture like the one to the right. (Click the image for a larger version)
For this method your going to have to go outside and find bright location which is out of direct sunlight. (Don't pick an over cast day, it just won't work, trust me I've tried it.)
You may be thinking why not use the direct sunlight, well there are two main problems.
1. Awkward shadows are cast on the model (half cab buses for instance are a serious challenge).
2. The camera will be very close to the subject, so it will be difficult to avoid shadows from this and it's operator falling across the model.
You'll need to position the model and camera in such a way to minimize any unwanted reflections, You can use the card as above to block some, but be careful of those unwanted shadows again.
Now take the picture using either a tripod or the self timer method explained below. You should get a fairly shape result, however this really does depend on the amount of daylight available.
I Don't Have A Tripod
 If you don't have a tripod, then the normal freehand held camera shots will probably end up looking something like the results on the left, this shows the effects of camera shake, even the slightest movement will be highly visible.
However I didn't use a tripod to take the previous sharp picture above. so how did I do it? Well the shake is caused by the actual pressing of the shutter release. I simply eliminated the problem by using the cameras built in self timer, and the back of a chair.
Here's how to do it in detail. Turn the cameras self timer on (Your probably find you have to re-select this option before every shot). Line the model up in the frame using the display. Press the shutter and then make any last fine adjusts to the framing. Now grip the camera lightly but firmly in both hands, and rest your hands against the edge of the table, a chair back or something similar which can act as a solid support. Wait for the camera to finish it's count down, (mine takes 10 seconds) and then take the shot. You should with any luck get a much improved result almost equal to using a tripod.
Some problems you might experienceNo flash when working indoors will give a result similar to this. The front and rear of the model are both out of focus, this is due to a fast shutter speed and big aperture setting. This is known as 'a small depth of field' this is often a major problem when using macro mode.
Normal full flash used in doors will result in a dreary under lit background, and an unevenly lit model, but you do get a larger depth of field and therefore shaper picture.
If you don't have a digital camera then photographing your models is going to be tricky, unless your lucky enough to have a 35mm SLR camera.
If you do have an SLR camera then you have the advantage of being able to manually adjust the shutter and aperture settings to force a large depth of field. I would recommend using the daylight only method. Using a flash may have unpredictable results.
The main disadvantage of using film is that you have no way of being sure of the quality of the final prints, so it could prove to be an expensive process of trial and error.
Sadly if you've only got a fixed focus compact camera then your very unlikely to get acceptable results because these cameras will usually be unable to focus on anything less than 80cm (2ft 6") from the lens. so an in focus model will only fill a very small proportion of the frame at that distance.
 In the above examples I used a plain background, but there's no reason why you shouldn't add a little more interest to your pictures. Build a diorama, there are several card kits available of bus garages and bus stations, while a wide range of other buildings can also be found which are mainly aimed at model railway enthusiasts, remember all 'OO' model railway accessories will be in prefect scale with your 1/76th EFE models.
This picture was produced using a Southdown Garage built from a card kit, and a tarmac effect ground card from a Corgi OOC garage kit. The sky effect in the background was produced by using the inside lining from the models box.
A low camera angle was chosen to give the point of view that a 'scale' person would see if they were placed in the scene.
Why not give it a go, if you've got any of these models in your collection, why not help me to complete this site by supplying some photographs, You'll receive due credit for any that I use.
If you want to see just how life like your models can look, visit Georg Hämel's excellent London Model Bus Page for some really stunning pictures.