 |
| Click the small pictures throughout the review to view larger versions. Please Note: This kit is now availabe from Agora Models (See update below) Review & photographs by Melvyn Gosberg. Visit Melvyn's online model store at www.acemodelbus.com. 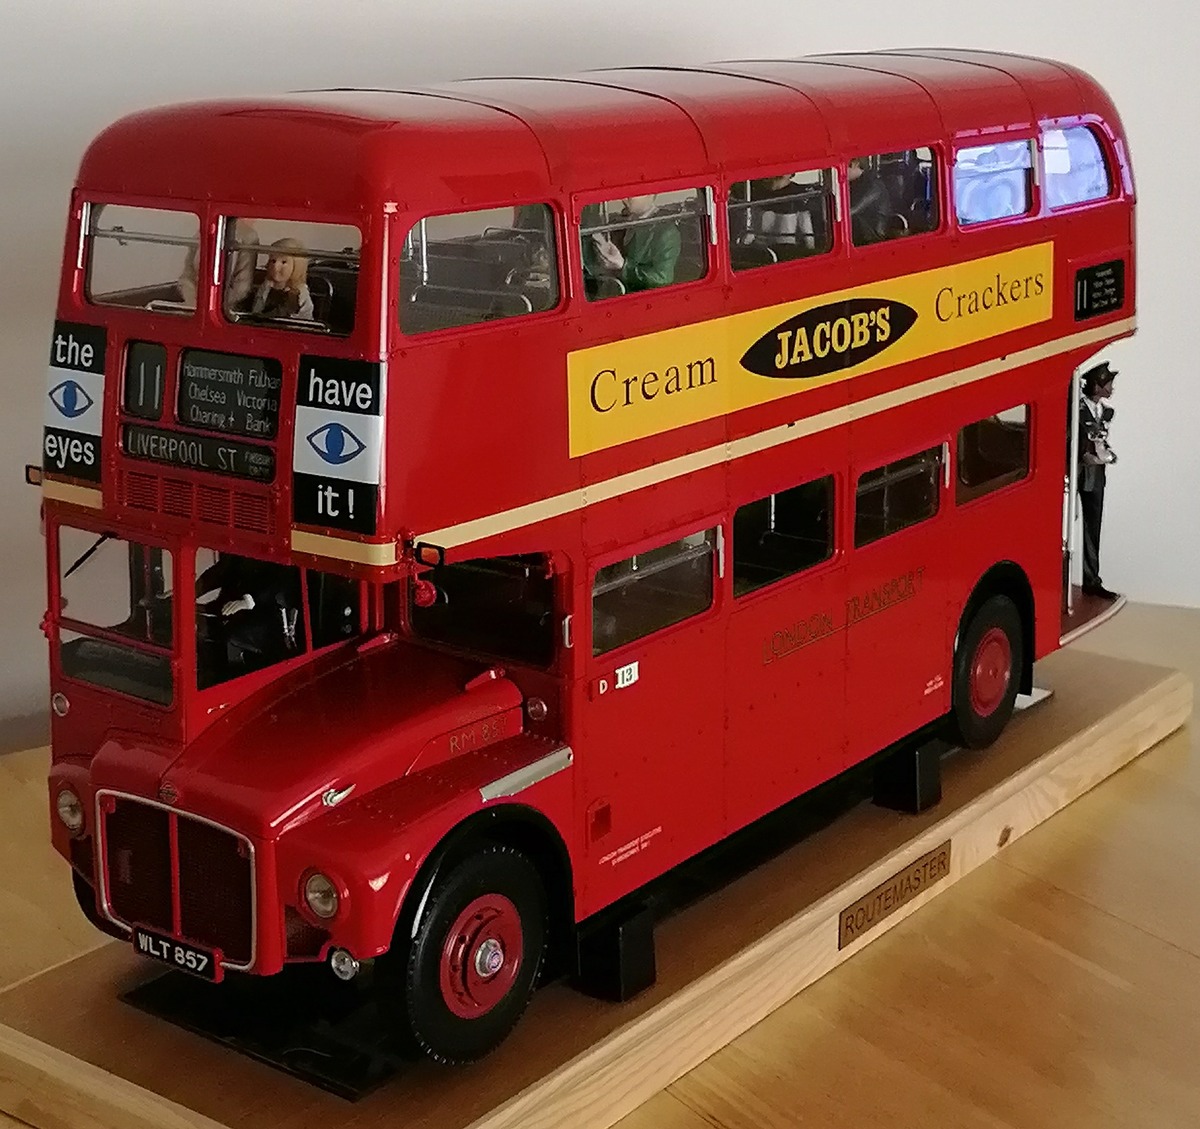 The fully built Hatchette London Transport Routemaster Bus |
|
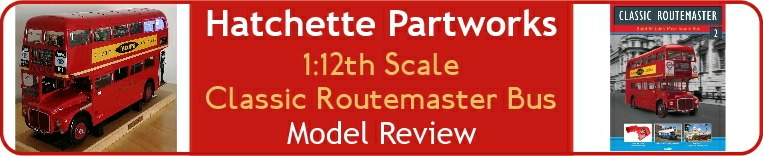
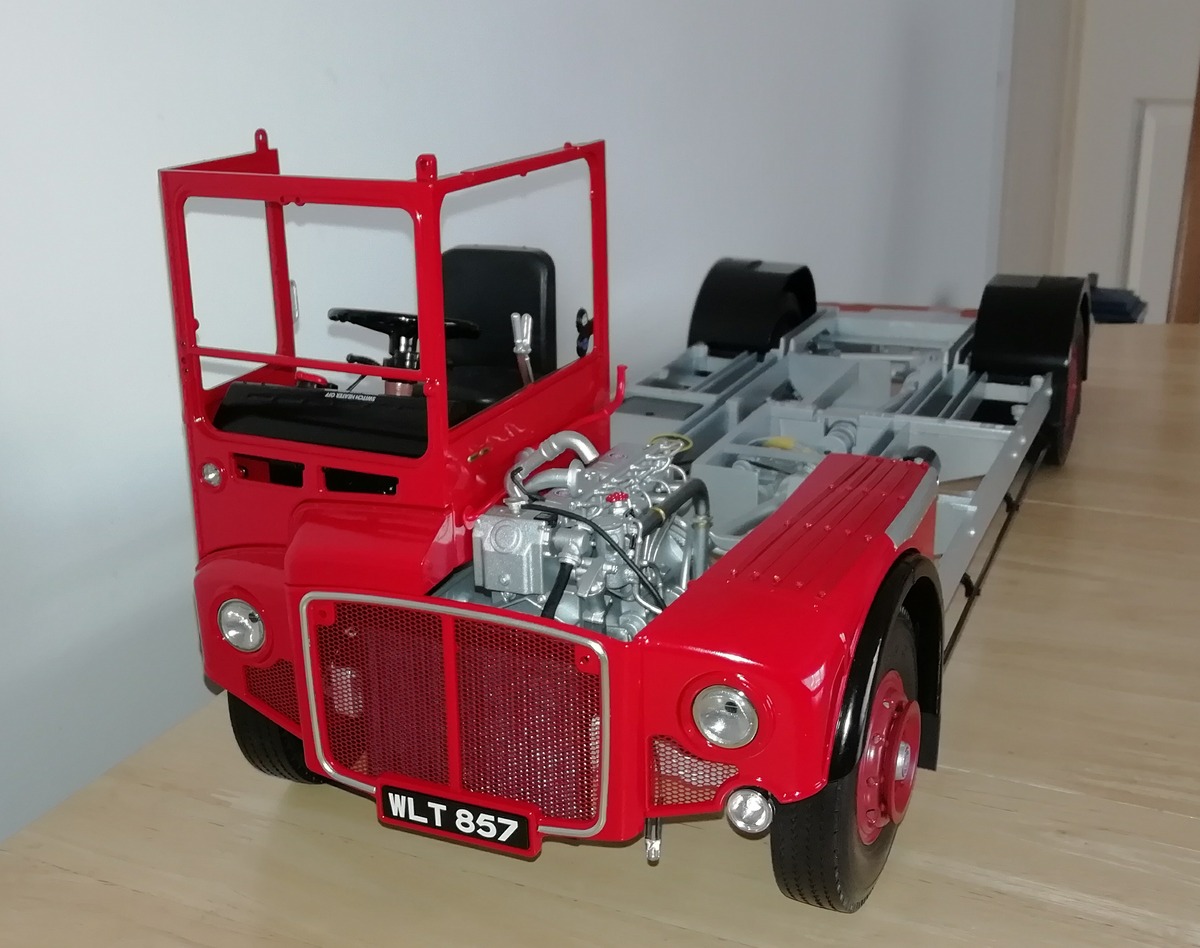
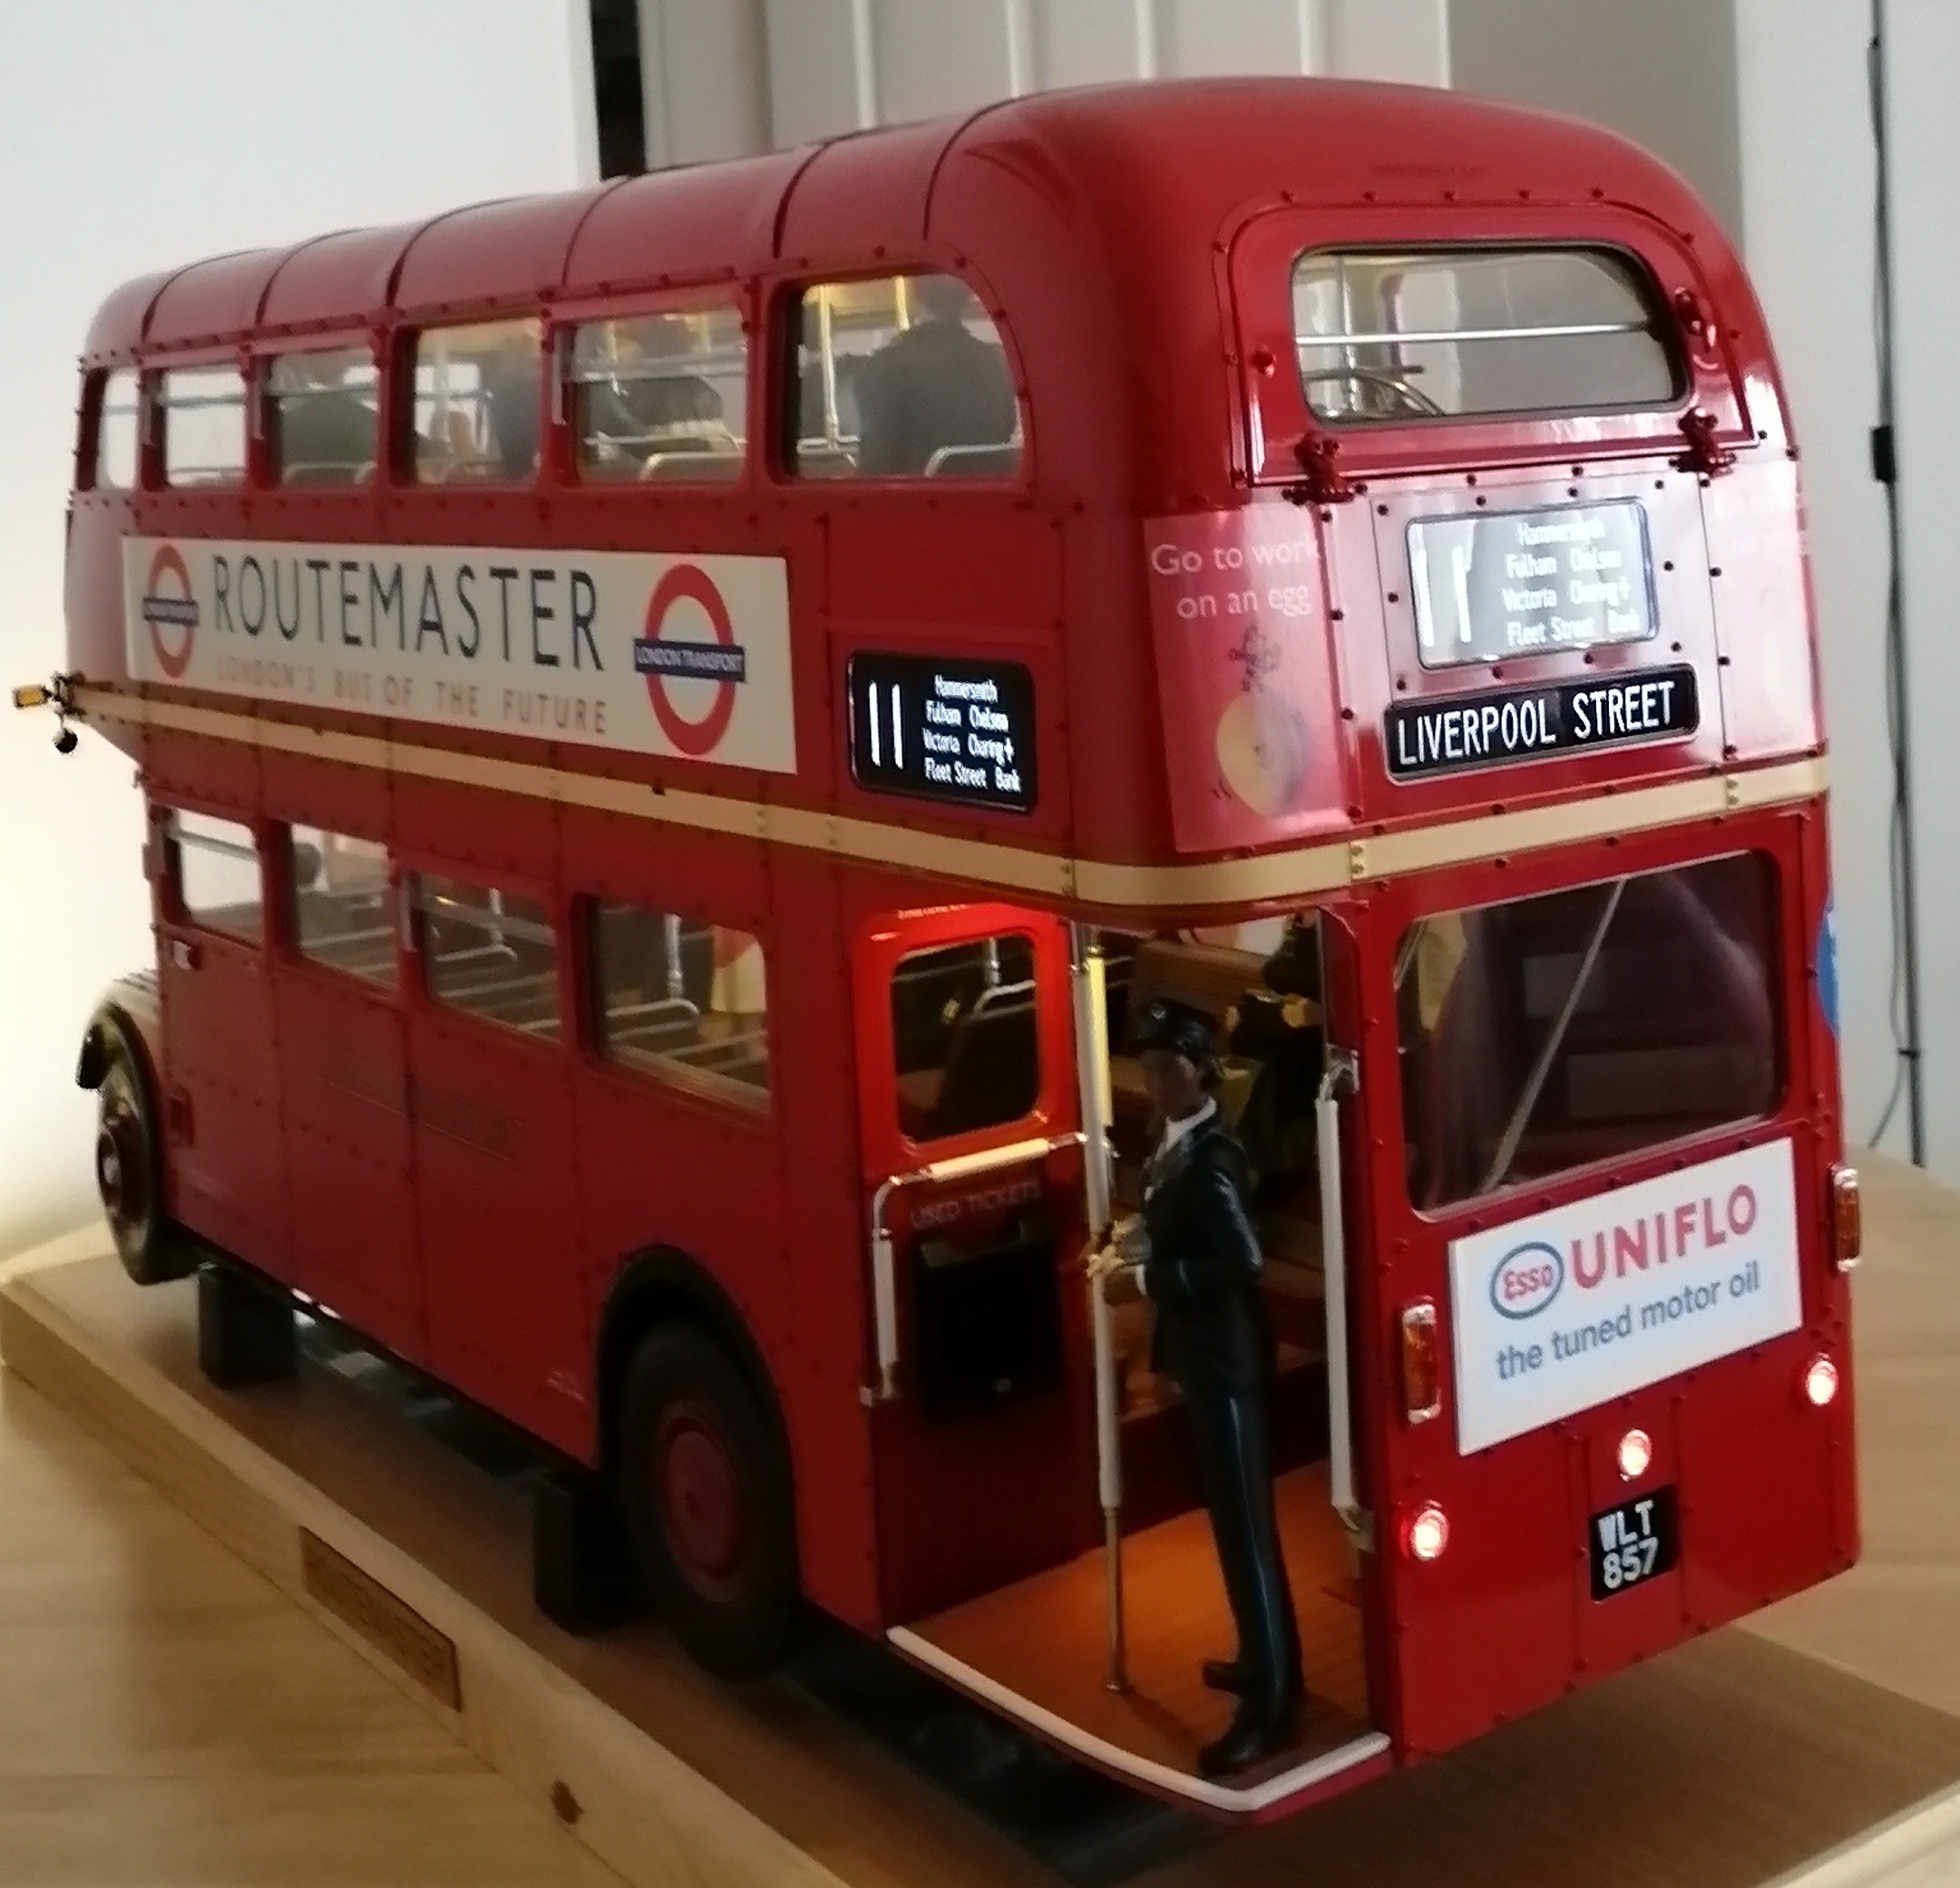
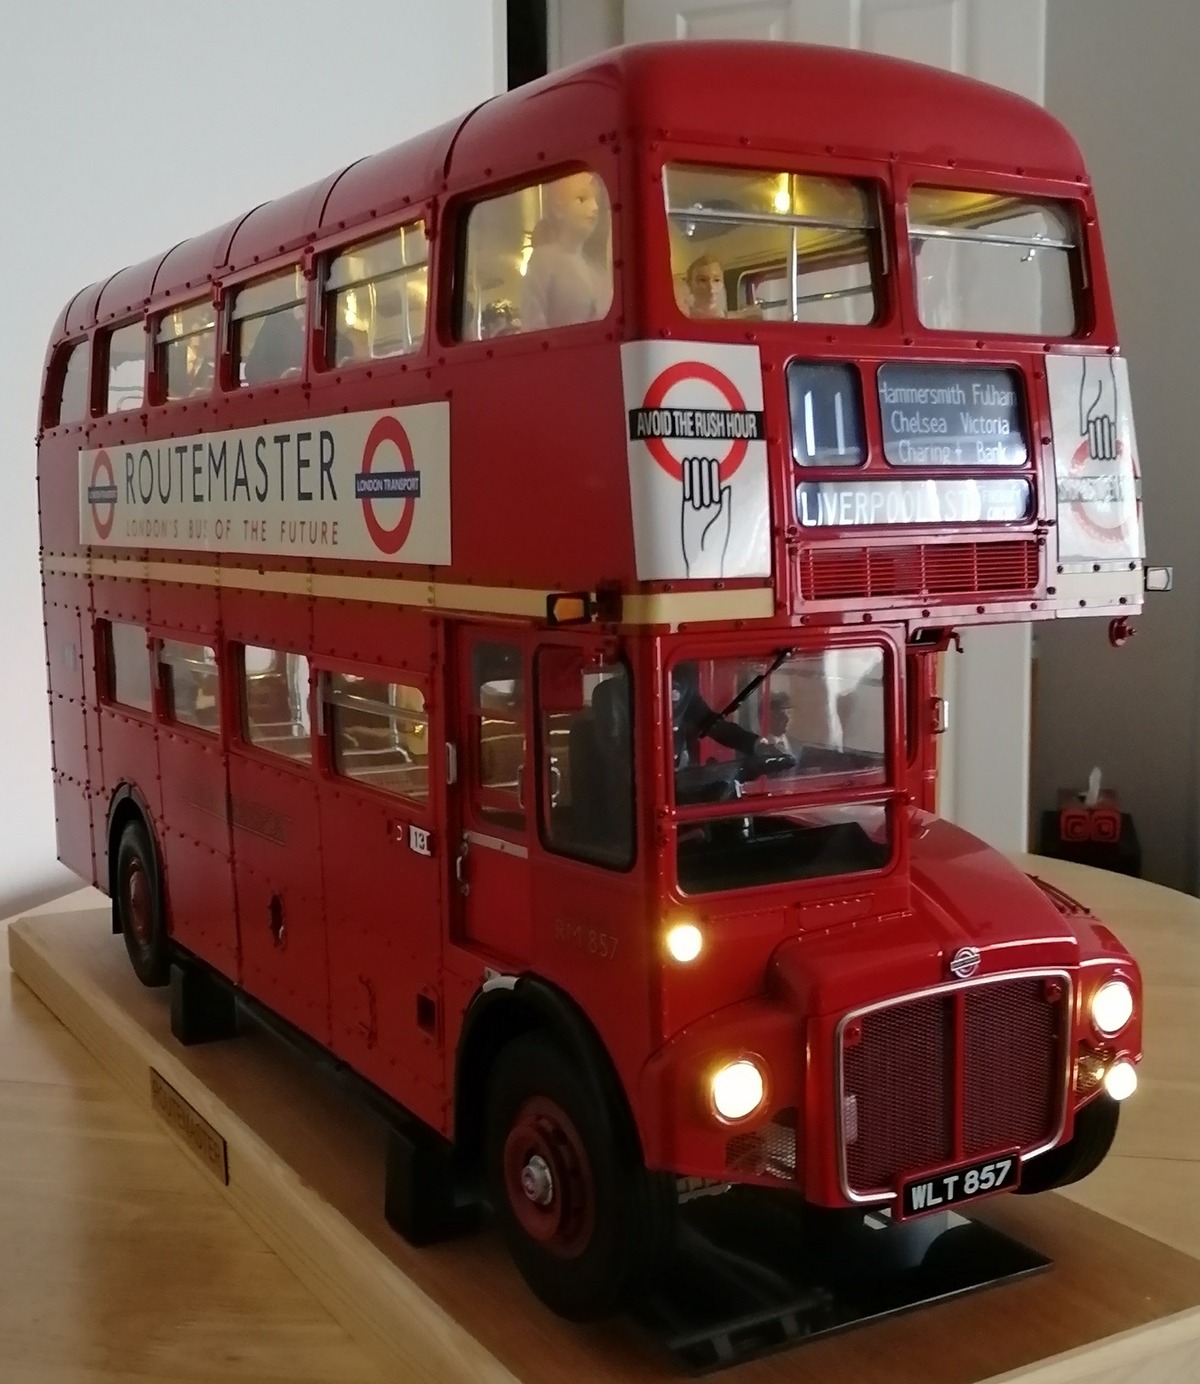
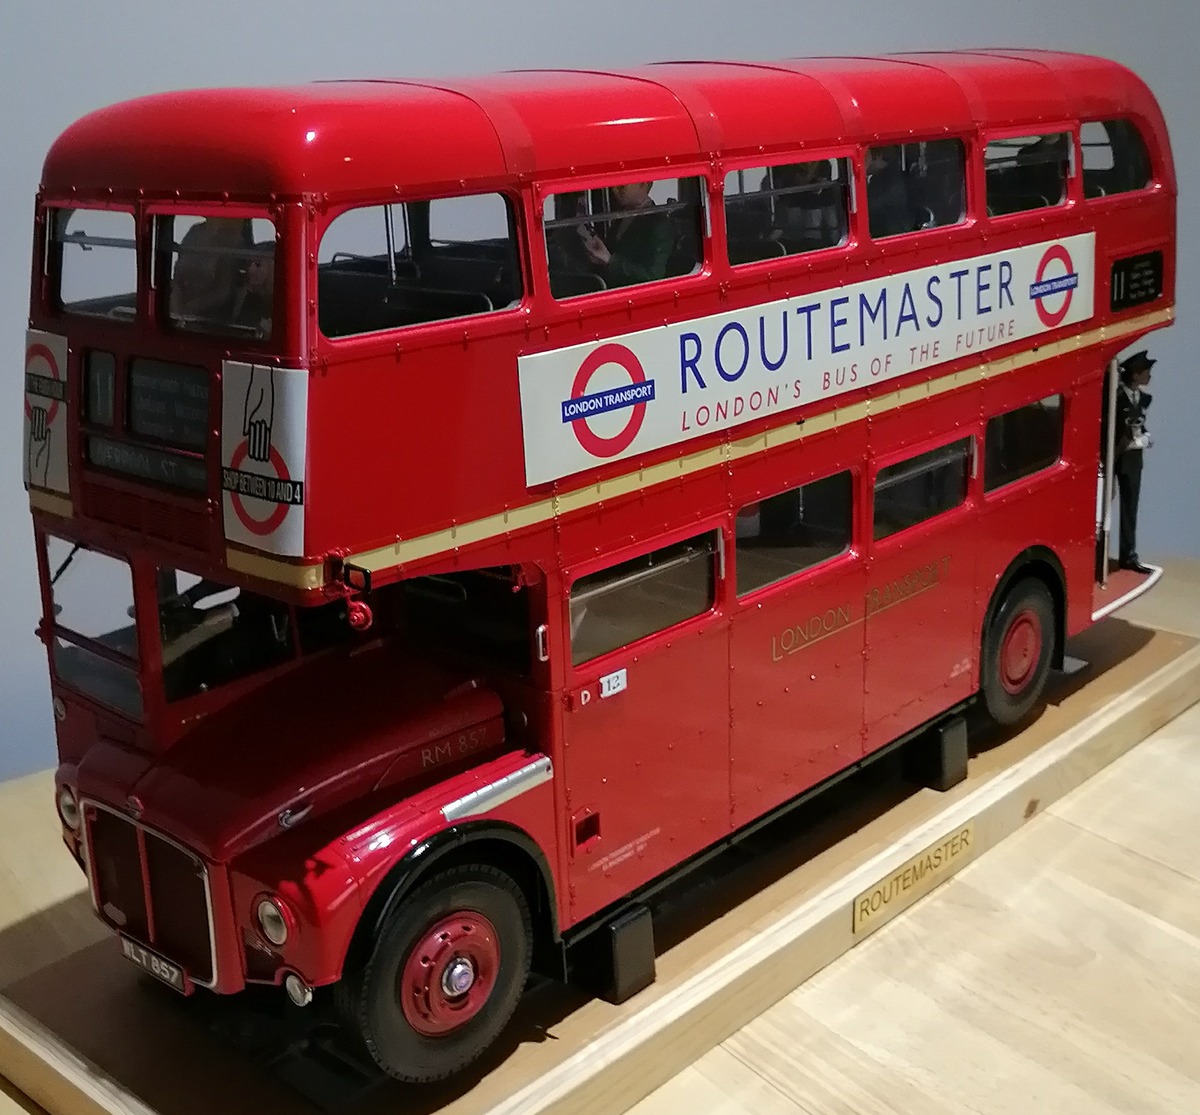
This is the first time I have ever assembled a part works model. The project started in January 2018 and finished in July 2020 the dates being inclusive, so overall it had taken two years and seven months to complete the model, in one hundred and thirty (130) weekly parts. The parts for the model came with a weekly magazine, with assembly instructions on how to construct the parts for that particular week. All parts are assembled with screws and even a screwdriver is provided. The model is very heavy, as the chassis is made up of metal, as well as the side frames and the upper frame, the upper frame holds the upper deck floor, this sits on the lower deck roof. The outer frames of the model are then, like the real bus, covered in aluminium panels, and screwed to the frame with tiny screws. All the outer panels are pre-painted red with the appropriate London Transport and all legal lettering already applied. The interior is made of a heavy-duty plastic, already pre-coloured, but I repainted the entire interior for a more authentic look, the only exception being the seats which have a very convincing moquette covering finish applied that matches the real seats. The model has lots of features, including, detailed engine, steerable front wheels, interior lighting, working bells, front and rear working lights, destination display lighting, working front destination blind, so you can change the route. There's even a realistic engine noise sound effect. Building the model started with the chassis frame and onto this goes various parts, to bring the whole chassis together, the front springs are very solid, to hold the suspension, as well as the rear axle mountings, which give a very strong structure for the body of the model to be attached at a later stage. Onto the chassis, goes the driver's floor, then the main lower interior floor with side panels, seats and windows are added, along with the bulkheads and the rear stairs, which has already been constructed. Next the upper deck floor, interior and seats with the windows are fitted, along with the interior roof. | |||||

| |||||
|
The upper interior was made wrong, all Routemasters have the interior light bulbs above the windows in the roof section, but for some reason the back nearside window did not have a fitting for a bulb. A bulb was instead fitted to the rear bench seat side panel, shining onto the stairs, this would have never been fitted when this Routemaster was in service at the time. The hole in the side panel was filled and repainted, while a new hole was drilled in the roof for a light, the light from the rear bench seat was then rewired, soldered and fitted into the new position. Also, the upper bell was omitted too, so a new working bell was sourced, rewired and fitted. The roof top panels were next fitted and screwed into place, unfortunately, the panels are supplied as three large sections, but the actual bus would have had seven smaller panels. To correct this, new beading was made to reproduce the additional panels. Finally, wing mirrors and indicators are fitted, then adverts were applied to the sides and front of the bus. For some reason no adverts were provided for the back of the model, so some after market adverts were applied, as well as new side adverts which were made magnetic and applied over the original supplied adverts. Overall a very good model, the shape of the bus has been captured well, some modelling experience would help to build the model, but even with no modelling experience, a good model can be produced from the instructions. When completed the model measures Length: 699mm, Width: 203mm, Height: 365mm and has 1182 parts with 4853 screws.
| 
| I give the model 8.5/10 for build and fit of parts and would recommend it very highly. MBZ Update & Postscript 2025 Agora are offering the kit with a variety of delivery options which range from 2 years to full kit in one delivery. Prices as of January 2025: The 12 month subscription plan is priced Ł119.99 per month for the 12 months, the first month is however discounted by 50%, for the 24 month plan the price is Ł64.99 per month with the first month discounted to Ł59.99. There's also starter pack containing the first six parts for Ł639.00, followed by monthly deliveries of the remianing 6 part for Ł119.99 each. Finally, the complete kit can be purchased & delivered in one shipment for Ł1299.99 (These prices are for UK delivery) Please note, The Agora Models version is parts only, the fully illustrated step by step instructions are available, & free to download as PDF documents from the Agora website. Links to assembly videos produced by YouTuber Waynes World are also provided along with a guide detailing the models dimensions & main features. Model Review Index |
| ||